


 Damage
  Loss
Loss  Theft
Theft 


Complete Guide: Installing Solar Panels on Your Roof
Transform your home into an energy-efficient powerhouse and dramatically reduce your electricity expenses. This comprehensive step-by-step guide will walk you through the complete installation journey, from initial planning to final system activation. Whether you're a skilled DIY enthusiast or working alongside certified technicians, this resource will help you understand every aspect of bringing clean solar energy to your property.
Understanding Photovoltaic Solar Technology
Before embarking on your solar panel installation journey, it's essential to grasp how photovoltaic (PV) technology transforms sunlight into usable electricity for your home. This fundamental knowledge will empower you to make informed decisions throughout your solar project.
Photovoltaic panels harness the power of sunlight by converting it directly into electrical energy through advanced semiconductor materials. The technology involves several critical components working in harmony:
- Monocrystalline Panels: These premium panels deliver superior efficiency and feature a sleek, uniform appearance. They command a higher price point but provide excellent performance, especially in limited roof space scenarios.
- Polycrystalline Panels: While offering slightly reduced efficiency, these panels present a more affordable option, making them an attractive choice for budget-conscious homeowners seeking sustainable energy solutions.
Beyond the panels themselves, a comprehensive solar system incorporates essential components including solar panels, battery storage units (for off-grid or backup power), controllers, inverters, and all necessary mounting hardware and electrical connections. These elements work together seamlessly to capture, convert, store, and deliver clean electricity throughout your property.
Evaluating Your Roof for Solar Installation
Before investing in solar panels for your property, it's crucial to conduct a thorough assessment of your roof's suitability. An ideal candidate roof should feature adequate structural integrity, optimal orientation, and sufficient unshaded surface area. Consider these fundamental factors during your evaluation:
Roof Condition Assessment: Your roof must be in excellent structural condition to safely support solar panel arrays for the next 25-30 years. If your roof requires repairs or replacement, address these issues before installation. In regions like South Africa, it's particularly important to ensure your roof can withstand intense sunlight exposure, potential storm damage, and the additional weight of solar equipment.
Legal Compliance and Permits: Another critical consideration involves understanding local building codes and obtaining all required permits well before installation begins. Many municipalities have established specific guidelines and regulations for residential solar installations, including neighborhood aesthetic standards and electrical grid connection requirements.
Step-by-Step Solar Panel Installation Process
Once your roof has been thoroughly evaluated, it's time to begin the actual installation process. Whether you're undertaking a DIY installation or collaborating with certified professionals, following these systematic steps will ensure a successful and efficient installation.
1Gather Essential Materials and Tools
Before commencing installation work, assemble all necessary equipment and materials. Your comprehensive toolkit should include solar panels, secure mounting brackets, durable trusses, various screws and fastening hardware, appropriate drill bits, a high-quality ladder, and complete safety equipment including harnesses and non-slip footwear. Additionally, gather all electrical components such as wiring, conduit systems, and protective coverings as specified in your system design.
2Install the Mounting System
The mounting system serves as the critical foundation for your solar installation. Begin by carefully positioning the mounting brackets on your roof structure. Locate the structural rafters or trusses beneath your roofing material to ensure solid anchoring points. Precisely position each bracket in alignment with the planned panel layout, then firmly secure them to the underlying structure. Always verify proper waterproofing and sealing around penetration points to prevent future leaks and maintain roof integrity.
3Attach the Racking System
With the mounting brackets securely in place, proceed to attach the rail system. These horizontal or vertical rails will directly support your solar panels. Ensure the panels are firmly positioned along the rails, oriented either vertically or horizontally depending on your specific roof configuration and panel specifications.
4Complete the Panel Wiring
Following racking installation, you'll need to establish all electrical connections for your solar array. This phase requires meticulous attention to detail. An experienced electrician must configure the wiring according to the manufacturer's precise specifications. Carefully review the panel manufacturer's wiring diagrams and connection instructions to ensure proper configuration.
Professional Solar Panel Mounting Solutions
Ensure secure and reliable solar panel installation with professional-grade mounting hardware designed for durability and performance.
EcoFlow Suction Cups5Install Inverter and Battery System (if applicable)
The inverter represents a vital component of your solar power system, converting direct current (DC) electricity produced by your panels into alternating current (AC) electricity used by your household appliances. Your inverter package includes an integrated battery for energy storage (essential for off-grid systems), along with charge controllers, inverter units, and comprehensive monitoring systems.
6Connect to the Electrical Grid or Establish Off-Grid Configuration
The final connection phase involves integrating your solar system with your home's electrical infrastructure or, alternatively, establishing a self-sufficient off-grid setup. This complex procedure typically requires certified professional assistance to ensure code compliance and system safety. Following successful completion, your solar installation should operate efficiently, delivering clean, renewable energy while significantly reducing your dependence on traditional utility power sources.
Important Safety Note: A properly designed solar panel installation maintains careful power flow management, directing excess electricity to either battery storage or the utility grid, while seamlessly drawing supplemental power when solar production is insufficient. Always adhere to the manufacturer's comprehensive installation guidelines and applicable local electrical codes to ensure your system operates safely, efficiently, and maintains longevity.

Critical Mistakes to Avoid During Installation
Even experienced installers can encounter challenges during solar panel installation. Understanding and avoiding these common pitfalls will significantly enhance the performance and safety of your solar energy system:
Inadequate System Sizing: One frequent error involves underestimating energy requirements, resulting in insufficient power generation. Design your solar array to significantly exceed minimum needs, ensuring your roof receives maximum sunlight exposure throughout daylight hours.
Poor Installation Practices: Improper installation techniques can lead to chronic system inefficiency or even structural damage to your property. Always engage certified solar installation professionals if you lack confidence in performing the work independently.
Neglecting System Maintenance: Solar panels require periodic inspection and maintenance to sustain optimal performance. Regular professional assessments will help identify potential issues before they compromise system efficiency and reliability.
Final Phase: Testing and Monitoring Your Solar Power System
Once your solar panels are completely installed, the crucial next step involves comprehensive system testing to verify everything operates correctly. Conduct thorough testing of all electrical connections, examine every component for proper installation and secure mounting, and verify system functionality through actual power generation monitoring under various lighting conditions. Implement regular maintenance protocols and continuous performance monitoring to help detect any emerging issues quickly and maintain peak system efficiency throughout its operational lifetime.
Conclusion
By following this comprehensive installation guide, you're taking a significant step toward energy independence and environmental stewardship. While solar panel installation requires careful planning and execution, the long-term financial benefits and positive environmental impact make it an exceptionally worthwhile investment. A professionally installed solar system will substantially reduce your monthly electricity expenses, increase your property value, and provide clean, renewable power for decades. Whether you choose the DIY approach or engage certified professionals, careful attention to proper installation procedures ensures your system delivers optimal performance and reliable energy production for years to come.
Frequently Asked Questions
Before proceeding with solar panel installation, carefully assess several critical factors including your current roof condition, available sunlight exposure throughout the year, local climate considerations, and budgetary constraints. Additionally, conduct thorough research on your utility company's net metering policies and available incentive programs. Consulting with qualified solar professionals will help ensure proper system sizing and optimal panel positioning for maximum energy production and long-term reliability.
Contemporary solar panels typically deliver reliable performance for 25-30 years, though many continue generating electricity well beyond this timeframe with gradually decreasing efficiency. Through proper installation and consistent maintenance protocols, your panels can continue producing clean energy for decades, making them an excellent long-term investment in sustainable power generation.
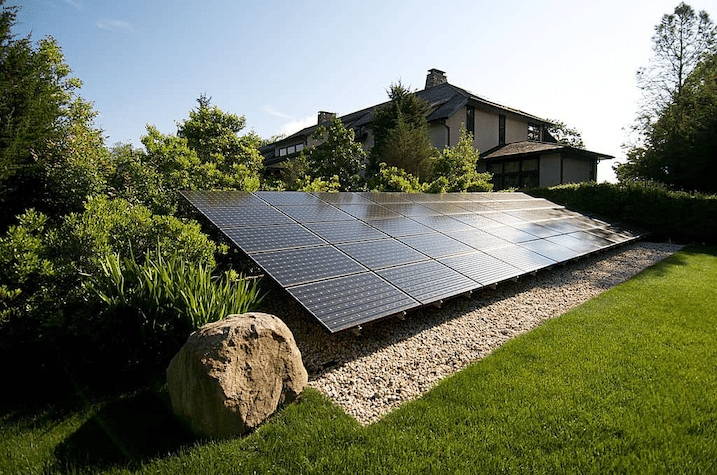
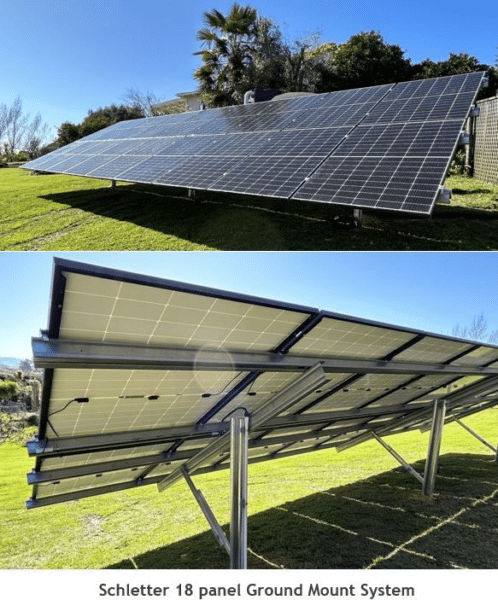
Absolutely! Solar panels can be successfully installed on flat roof surfaces by utilizing specialized tilted mounting systems. These adjustable mounting structures position panels at optimal angles to maximize sunlight capture throughout the day, ensuring efficient energy production even on horizontal roof surfaces.